Building and Deploying a Containerized Application with Amazon Elastic Kubernetes Service - Lab
SPL-BE-200-COCEKS-1 - Version 1.0.8
© 2023 Amazon Web Services, Inc. or its affiliates. All rights reserved. This work may not be reproduced or redistributed, in whole or in part, without prior written permission from Amazon Web Services, Inc. Commercial copying, lending, or selling is prohibited. All trademarks are the property of their owners.
Note: Do not include any personal, identifying, or confidential information into the lab environment. Information entered may be visible to others.
Corrections, feedback, or other questions? Contact us at AWS Training and Certification.
Lab overview
When you complete this lab, you will be able to do the following tasks:
- Prepare an AWS Cloud9 workspace.
- Create an Amazon EKS cluster.
- Prepare a Docker application and push it to an Amazon Elastic Container Registry (Amazon ECR) repository.
- Deploy an AWS Load Balancer Controller.
- Deploy an application into an Amazon EKS cluster.
- Configure and view Amazon CloudWatch Container Insights on a Kubernetes cluster.
PREREQUISITES
To complete this lab, you must know how to do the following:
- Navigate the AWS Management Console.
- Use shell commands in Linux environments.
This lab requires approximately 60 minutes to complete.
Start lab
- To launch the lab, at the top of the page, choose Start lab.
You must wait for the provisioned AWS services to be ready before you can continue.
- To open the lab, choose Open Console.
You are automatically signed in to the AWS Management Console in a new web browser tab.
Do not change the Region unless instructed.
COMMON SIGN-IN ERRORS
Error: You must first sign out
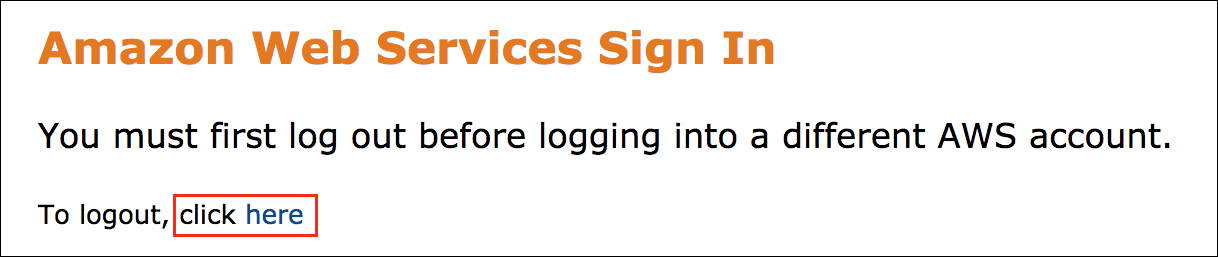
If you see the message, You must first log out before logging into a different AWS account:
- Choose the click here link.
- Close your Amazon Web Services Sign In web browser tab and return to your initial lab page.
- Choose Open Console again.
Error: Choosing Start Lab has no effect
In some cases, certain pop-up or script blocker web browser extensions might prevent the Start Lab button from working as intended. If you experience an issue starting the lab:
- Add the lab domain name to your pop-up or script blocker’s allow list or turn it off.
- Refresh the page and try again.
Task 1: Preparing the AWS Cloud9 workspace
In this task, you connect to an AWS Cloud9 environment and configure it for use with Amazon EKS.
- To open the AWS Cloud9 console, in the search box to the right of Services, search for and choose Cloud9.
AWS Cloud9 is a cloud-based integrated development environment (IDE) that you can use to write, run, and debug your code within your browser. It comes prepackaged with many tools that are commonly used in application development, including Docker, Python, and the AWS Command Line Interface (AWS CLI).
For the environment called Cloud9-EKS-Lab, choose the Open link.
You do not need the Cloud9 Welcome screen or any of the other default tabs that appear when you first launch Cloud9, so choose the x next to each tab to close them.
At the top of the IDE, choose the icon and choose New Terminal.
Take a moment to familiarize yourself with the AWS Cloud9 IDE interface.
- In the middle of the screen, a single terminal session is open in the editor. You can open multiple tabs in this window to edit files and run terminal commands.
- The file navigator appears on the left side of the screen. As you build out your CDK environment and application, additional directories and files will appear here.
- A gear icon appears on the right side of the screen. Choosing this icon opens the Cloud9 Settings panel.
Every AWS Cloud9 workspace is automatically assigned IAM credentials that provide it with limited access to some AWS services in your account. We call these AWS managed temporary credentials. In this case, however, the AWS managed temporary credentials do not include all of the IAM permissions needed to complete this lab. In the next step, you will disable the AWS managed temporary credentials.
Choose the gear icon at the top-right of the screen to open the AWS Cloud9 Preferences.
In the navigation panel on the left side of the screen, scroll down the page and choose AWS Settings.
Choose the toggle button to disable AWS managed temporary credentials.
Caution: During the course of this lab, you will edit multiple files. If any of the changes you make to these files are not saved, the lab will fail. To mitigate this risk, you will enable Auto-Save.
In the navigation panel on the left side of the preferences window, scroll down the page and choose Experimental.
Open the dropdown menu next to Auto-Save Files and choose On Focus Change.
At the top of the screen, choose the x to close the Preferences tab and return to the tab containing your terminal session.
Command: Enter the following command to confirm that the AWS managed temporary credentials have been successfully disabled.
aws sts get-caller-identityExpected output:
******************************
**** This is OUTPUT ONLY. ****
******************************

{
    "UserId": "AROAYFGPI3KKGO3T6FJ4U:i-0ba494bb24540ade0",
    "Account": "560927922836",
    "Arn": "arn:aws:sts::638489295426:assumed-role/LabStack-awsstudent-gSmHbdJcfeNjm9ovquT-Cloud9InstanceRole-1PD5MEE0U2N7A/i-0beecd72371598add"
}
Note: The Arn indicates that you are using an assumed role called Cloud9InstanceRole. This role has been pre-configured with the IAM permissions needed to complete this lab. Now that you’ve assumed your new IAM role, it’s time to install the CDK8S CLI.
- Command: To set a shell variable that contains the AWS region identifier, run the following command:
export AWS_DEFAULT_REGION=$(curl --silent http://169.254.169.254/latest/meta-data/placement/region) && echo $AWS_DEFAULT_REGIONExpected output:
******************************
**** This is OUTPUT ONLY. ****
******************************

us-west-2- Command: To start a shell script that prepares the AWS Cloud9 environment for completing further lab tasks, run the following commands:
cd eksLabRepo/
sh ./ekssetup.sh
Note
Commands are case sensitive.
Task 2: Creating the Amazon EKS cluster
In this task, you use the eksctl command to create an Amazon EKS cluster and a dedicated virtual private cloud (VPC) in the lab account. To learn more about the eksctl command, see:
- Command: To create the Amazon EKS cluster, in the AWS Cloud9 terminal, run the following commands:
eksctl create cluster \
--name eks-lab-cluster \
--nodegroup-name worknodes-1 \
--node-type t3.medium \
--nodes 2 \
--nodes-min 1 \
--nodes-max 4 \
--managed \
--region ${AWS_DEFAULT_REGION}
Expected output:
******************************
**** This is OUTPUT ONLY. ****
******************************

2023-07-25 19:24:27 [ℹ]  eksctl version 0.150.0-dev
2023-07-25 19:24:27 [ℹ]  using region us-west-2
2023-07-25 19:24:27 [ℹ]  setting availability zones to [us-west-2d us-west-2a us-west-2b]
2023-07-25 19:24:27 [ℹ]  subnets for us-west-2d - public:192.168.0.0/19 private:192.168.96.0/19
2023-07-25 19:24:27 [ℹ]  subnets for us-west-2a - public:192.168.32.0/19 private:192.168.128.0/19
2023-07-25 19:24:27 [ℹ]  subnets for us-west-2b - public:192.168.64.0/19 private:192.168.160.0/19
2023-07-25 19:24:27 [ℹ]  nodegroup "worknodes-1" will use "" [AmazonLinux2/1.25]
2023-07-25 19:24:27 [ℹ]  using Kubernetes version 1.25
2023-07-25 19:24:27 [ℹ]  creating EKS cluster "eks-lab-cluster" in "us-west-2" region with managed nodes
2023-07-25 19:24:27 [ℹ]  will create 2 separate CloudFormation stacks for cluster itself and the initial managed nodegroup
2023-07-25 19:24:27 [ℹ]  if you encounter any issues, check CloudFormation console or try 'eksctl utils describe-stacks --region=us-west-2 --cluster=eks-lab-cluster'
2023-07-25 19:24:27 [ℹ]  Kubernetes API endpoint access will use default of {publicAccess=true, privateAccess=false} for cluster "eks-lab-cluster" in "us-west-2"
2023-07-25 19:24:27 [ℹ]  CloudWatch logging will not be enabled for cluster "eks-lab-cluster" in "us-west-2"
2023-07-25 19:24:27 [ℹ]  you can enable it with 'eksctl utils update-cluster-logging --enable-types={SPECIFY-YOUR-LOG-TYPES-HERE (e.g. all)} --region=us-west-2 --cluster=eks-lab-cluster'
2023-07-25 19:24:27 [ℹ]
2 sequential tasks: { create cluster control plane "eks-lab-cluster",
    2 sequential sub-tasks: {
        wait for control plane to become ready,
        create managed nodegroup "worknodes-1",
    }
}
2023-07-25 19:24:27 [ℹ]  building cluster stack "eksctl-eks-lab-cluster-cluster"
2023-07-25 19:24:27 [ℹ]  deploying stack "eksctl-eks-lab-cluster-cluster"
2023-07-25 19:24:57 [ℹ]  waiting for CloudFormation stack "eksctl-eks-lab-cluster-cluster"
2023-07-25 19:25:27 [ℹ]  waiting for CloudFormation stack "eksctl-eks-lab-cluster-cluster"
2023-07-25 19:26:27 [ℹ]  waiting for CloudFormation stack "eksctl-eks-lab-cluster-cluster"
2023-07-25 19:27:27 [ℹ]  waiting for CloudFormation stack "eksctl-eks-lab-cluster-cluster"
2023-07-25 19:28:27 [ℹ]  waiting for CloudFormation stack "eksctl-eks-lab-cluster-cluster"
2023-07-25 19:29:27 [ℹ]  waiting for CloudFormation stack "eksctl-eks-lab-cluster-cluster"
2023-07-25 19:30:28 [ℹ]  waiting for CloudFormation stack "eksctl-eks-lab-cluster-cluster"
2023-07-25 19:31:28 [ℹ]  waiting for CloudFormation stack "eksctl-eks-lab-cluster-cluster"
2023-07-25 19:32:28 [ℹ]  waiting for CloudFormation stack "eksctl-eks-lab-cluster-cluster"
2023-07-25 19:33:28 [ℹ]  waiting for CloudFormation stack "eksctl-eks-lab-cluster-cluster"
2023-07-25 19:34:28 [ℹ]  waiting for CloudFormation stack "eksctl-eks-lab-cluster-cluster"
2023-07-25 19:36:29 [ℹ]  building managed nodegroup stack "eksctl-eks-lab-cluster-nodegroup-worknodes-1"
2023-07-25 19:36:29 [ℹ]  deploying stack "eksctl-eks-lab-cluster-nodegroup-worknodes-1"
2023-07-25 19:36:29 [ℹ]  waiting for CloudFormation stack "eksctl-eks-lab-cluster-nodegroup-worknodes-1"
2023-07-25 19:36:59 [ℹ]  waiting for CloudFormation stack "eksctl-eks-lab-cluster-nodegroup-worknodes-1"
2023-07-25 19:37:52 [ℹ]  waiting for CloudFormation stack "eksctl-eks-lab-cluster-nodegroup-worknodes-1"
2023-07-25 19:39:11 [ℹ]  waiting for CloudFormation stack "eksctl-eks-lab-cluster-nodegroup-worknodes-1"
2023-07-25 19:39:11 [ℹ]  waiting for the control plane to become ready
2023-07-25 19:39:11 [✔]  saved kubeconfig as "/home/ec2-user/.kube/config"
2023-07-25 19:39:11 [ℹ]  no tasks
2023-07-25 19:39:11 [✔]  all EKS cluster resources for "eks-lab-cluster" have been created
2023-07-25 19:39:11 [ℹ]  nodegroup "worknodes-1" has 2 node(s)
2023-07-25 19:39:11 [ℹ]  node "ip-192-168-15-26.us-west-2.compute.internal" is ready
2023-07-25 19:39:11 [ℹ]  node "ip-192-168-82-0.us-west-2.compute.internal" is ready
2023-07-25 19:39:11 [ℹ]  waiting for at least 1 node(s) to become ready in "worknodes-1"
2023-07-25 19:39:11 [ℹ]  nodegroup "worknodes-1" has 2 node(s)
2023-07-25 19:39:11 [ℹ]  node "ip-192-168-15-26.us-west-2.compute.internal" is ready
2023-07-25 19:39:11 [ℹ]  node "ip-192-168-82-0.us-west-2.compute.internal" is ready
2023-07-25 19:39:11 [ℹ]  kubectl command should work with "/home/ec2-user/.kube/config", try 'kubectl get nodes'
2023-07-25 19:39:11 [✔]  EKS cluster "eks-lab-cluster" in "us-west-2" region is ready
The command creates an Amazon EKS Cluster that includes an Amazon EKS control plane and two worker nodes that the control plane manages. You can continue with the next task while this command completes. Creating the cluster takes 15–20 minutes. Notice the message “waiting for CloudFormation Stack eksctl-eks-lab-cluster-cluster” repeating many times.
Caution: During the lab, you might see one of the following messages:
Unable to use kubectl with the EKS cluster (check ‘kubectl version’): WARNING: This version information is deprecated and will be replaced with the output from kubectl version --short.
You can safely ignore this message. The kubectl version is updated later.
Unable to connect to the server: getting credentials: decoding stdout: no kind “ExecCredential” is registered for version “client.authentication.k8s.io/v1alpha1” in scheme “pkg/client/auth/exec/exec.go:62”
Command: If you see that message, to refresh the credential scheme, run the following command :
aws eks update-kubeconfig --name eks-lab-cluster --region ${AWS_DEFAULT_REGION}Expected output:
******************************
**** This is OUTPUT ONLY. ****
******************************

Added new context arn:aws:eks:us-west-2:638489295426:cluster/eks-lab-cluster to /home/ec2-user/.kube/config
Task 3: Creating Docker images
In this task, you create Docker images to use for the lab’s application. The application requires two containers for each pod.
| Container | Description | Dockerfile location |
|---|---|---|
| website | An Apache web server | ~/environment/eksLabRepo/website/ |
| sidecar | A Python script that passes output to the website container through a shared volume named emptyDir | ~/environment/eksLabRepo/sidecar/ |
Complete the following steps:
- Command: To change to the website directory and create the website Docker container, run the following commands:
cd ~/environment/eksLabRepo/website/
docker build -t website .
Expected output:
******************************
**** This is OUTPUT ONLY. ****
******************************

...
Removing intermediate container 5a99bd0be81f
 ---> 7f68b6cfe9db
Step 16/17 : WORKDIR /usr/local/apache2/htdocs/
 ---> Running in 7d9f952cc38d
Removing intermediate container 7d9f952cc38d
 ---> d636ee18c88c
Step 17/17 : CMD ./metadata.sh && crontab && crontab /etc/cron.d/cron && service cron restart && apachectl -D FOREGROUND
 ---> Running in d0c58a2d4119
Removing intermediate container d0c58a2d4119
 ---> 3cafafea4e20
Successfully built 3cafafea4e20
Successfully tagged website:latest- Command: To change to the sidecar directory and create the sidecar Docker container, run the following commands:
cd ~/environment/eksLabRepo/sidecar/
docker build -t sidecar .
Expected output:
******************************
**** This is OUTPUT ONLY. ****
******************************

...
Step 10/11 : RUN chmod -R 0777 /var/metadata/
 ---> Running in 1ef143ccd6c7
Removing intermediate container 1ef143ccd6c7
 ---> 488cfd91073f
Step 11/11 : CMD ./metadata2.sh
 ---> Running in 07a390a91411
Removing intermediate container 07a390a91411
 ---> 8e251ab07d92
Successfully built 8e251ab07d92
Successfully tagged sidecar:latest- Command: To start the website Docker container and preview the running application in AWS Cloud9, run the following command:
docker run -P -d -p 8080:80 websiteExpected output:
******************************
**** This is OUTPUT ONLY. ****
******************************

3c7296e5d9fc2213e35be53861e222e163301e6e53877349cd9d6cdb637bfe0f- To view the application progress, on the Preview menu, choose Preview Running Application. Notice the web page running in the right panel. You can close the preview panel.

In the next steps, you stop the running container.
- Command: To list the running containers, run the docker pscommand.
******************************
**** This is OUTPUT ONLY. ****
******************************
$ docker ps
CONTAINER ID   IMAGE     COMMAND                  CREATED         STATUS         PORTS                                   NAMES
1235ab9961ea   website   "/bin/sh -c './metad…"   2 minutes ago   Up 2 minutes   0.0.0.0:8080->80/tcp, :::8080->80/tcp   fix_monkeys
Copy the unique CONTAINER ID from the command’s output; you use it in the following step.
Command: To stop the container, run the
docker stop CONTAINER_IDcommand, replacing CONTAINER_ID with the string you just copied.
Expected output:
******************************
**** This is OUTPUT ONLY. ****
******************************

3c7296e5d9fc
Task 4: Creating an Amazon ECR repository and pushing the Docker image to it
In this task, you use the Amazon ECR service to create container repositories to store the Docker images and push the images to those repositories.
- Command: To create the website and sidecar repositories, run the following commands:
aws ecr create-repository \
 --repository-name website \
 --region ${AWS_DEFAULT_REGION}
aws ecr create-repository \
 --repository-name sidecar \
 --region ${AWS_DEFAULT_REGION}
Each command returns JSON text that includes information about the repository, such as its name, ID, URI, and Amazon Resource Name (ARN).
Next, to help streamline further steps in the lab, you set environment variables to preserve the AWS account number, default AWS Region, and repository URI.
- Command: To store the lab information in environment variables, run the following commands:
cd ~/environment/eksLabRepo/
export ACCOUNT_NUMBER=$(aws sts get-caller-identity \
 --query 'Account' \
 --output text)
export ECR_REPO_URI_WEBSITE=$(aws ecr describe-repositories \
 --repository-names website \
 --region ${AWS_DEFAULT_REGION} \
 --query 'repositories[*].repositoryUri' \
 --output text)
export ECR_REPO_URI_SIDECAR=$(aws ecr describe-repositories \
 --repository-names sidecar \
 --region ${AWS_DEFAULT_REGION} \
 --query 'repositories[*].repositoryUri' \
 --output text)
Expected output:
None, unless there is an error.
- Command: To show the results of the environment settings, run the following commands:
echo ECR_REPO_URI_WEBSITE=$ECR_REPO_URI_WEBSITE && echo ECR_REPO_URI_SIDECAR=$ECR_REPO_URI_SIDECARExpected output:
******************************
**** This is OUTPUT ONLY. ****
******************************

ECR_REPO_URI_WEBSITE=638489295426.dkr.ecr.us-west-2.amazonaws.com/website
ECR_REPO_URI_SIDECAR=638489295426.dkr.ecr.us-west-2.amazonaws.com/sidecar- Command: To authenticate the service, so that you can later push the images to the repositories, run the following command:
aws ecr get-login-password \
--region ${AWS_DEFAULT_REGION} \
 | docker login \
 --username AWS \
 --password-stdin $ACCOUNT_NUMBER.dkr.ecr.${AWS_DEFAULT_REGION}.amazonaws.com
Expected output:
******************************
**** This is OUTPUT ONLY. ****
******************************

WARNING! Your password will be stored unencrypted in /home/ec2-user/.docker/config.json.
Configure a credential helper to remove this warning. See
https://docs.docker.com/engine/reference/commandline/login/#credentials-store

Login Succeeded
Caution: Confirm that you see Login Succeeded before you continue.
- Command: To tag and push the images to the repository, run the following commands:
docker tag website:latest $ECR_REPO_URI_WEBSITE:latest
docker push $ECR_REPO_URI_WEBSITE:latest
docker tag sidecar:latest $ECR_REPO_URI_SIDECAR:latest
docker push $ECR_REPO_URI_SIDECAR:latest
Expected output:
******************************
**** This is OUTPUT ONLY. ****
******************************

...
The push refers to repository [638489295426.dkr.ecr.us-west-2.amazonaws.com/sidecar]
0d4468b5e7b6: Pushed
85d498b6cf5d: Pushed
4fed08b1d7a1: Pushed
7d1af0e2efab: Pushed
6defaeb75834: Pushed
2177a9ff388e: Pushed
77be15a621d1: Pushed
1a9a055c45a7: Pushed
5f092f812712: Pushed
d73184360a99: Pushed
92740bab716b: Pushed
f555d719d9bb: Pushed
5bc340f6d4f5: Pushed
latest: digest: sha256:303aaf94989ea1b238793ee5112c1084782216c3ce60ad7e30a64bdfa34153fe size: 3036
Task 5: Authenticating to the Amazon EKS cluster
In this task, you authenticate the AWS Cloud9 session with the Amazon EKS cluster.
- Command: To set up the environment, run the following commands:
echo "export AWS_DEFAULT_REGION=${AWS_DEFAULT_REGION}" >> ~/.bash_profile
source ~/.bash_profile
aws configure set default.region $AWS_DEFAULT_REGION
Expected output:
None, unless there is an error.
To work with the Amazon EKS cluster, it must be in the ACTIVE state.
- Command: To view the status of the cluster, run the following command:
aws eks describe-cluster \
 --name eks-lab-cluster \
 --query 'cluster.status' \
 --output text
Expected output:
******************************
**** This is OUTPUT ONLY. ****
******************************

ACTIVE
If the cluster not in the ACTIVE state, wait a few minutes and repeat the command.
Wait until the cluster is in the ACTIVE state before proceeding.
- Command: To update the kubeconfig file to grant access for Kubernetes cluster management, run the following command:
aws eks update-kubeconfig \
 --region $AWS_DEFAULT_REGION \
 --name eks-lab-cluster
Expected output:
******************************
**** This is OUTPUT ONLY. ****
******************************

Updated context arn:aws:eks:us-west-2:638489295426:cluster/eks-lab-cluster in /home/ec2-user/.kube/config
For more information, see Create a kubeconfig for Amazon EKS.
- Command: To confirm that your session with the Amazon EKS cluster is authenticated, run the kubectl get svccommand.
Expected output:
******************************
**** This is OUTPUT ONLY. ****
******************************

NAME         TYPE        CLUSTER-IP   EXTERNAL-IP   PORT(S)   AGE
kubernetes   ClusterIP   10.100.0.1   <none>        443/TCP   31m
Task 6: Running the AWS Load Balancer Controller on Amazon EKS
You can run an Application Load Balancer (ALB) to route HTTP and HTTPS traffic to Kubernetes pods within the Amazon EKS cluster. To do this, you install the AWS Load Balancer Controller (formerly called the ALB Ingress Controller) add-on. The add-on requires an IAM policy and a Kubernetes service.
You can use the eksctl command, along with the helm command to install the controller. In this lab, the commands are provided in a shell script called albController.sh, which you can find in the lab’s working directory.
- Command: To start the shell script to install AWS Load Balancer Controller, run the following commands:
cd ~/environment/eksLabRepo
sh ./albController.sh
The script might take a few minutes to complete.
Expected output:
******************************
**** This is OUTPUT ONLY. ****
******************************

Running: eksctl utils associate-iam-oidc-provider --region us-west-2 --cluster eks-lab-cluster --approve
2023-07-25 19:59:30 [ℹ]  will create IAM Open ID Connect provider for cluster "eks-lab-cluster" in "us-west-2"
2023-07-25 19:59:30 [✔]  created IAM Open ID Connect provider for cluster "eks-lab-cluster" in "us-west-2"
Running: eksctl create iamserviceaccount --cluster=eks-lab-cluster --namespace=kube-system --name=aws-load-balancer-controller --role-name AmazonEKSLoadBalancerControllerRole --attach-policy-arn=arn:aws:iam::638489295426:policy/AWSLoadBalancerControllerIAMPolicy --approve
2023-07-25 19:59:31 [ℹ]  1 iamserviceaccount (kube-system/aws-load-balancer-controller) was included (based on the include/exclude rules)
2023-07-25 19:59:31 [!]  serviceaccounts that exist in Kubernetes will be excluded, use --override-existing-serviceaccounts to override
2023-07-25 19:59:31 [ℹ]  1 task: {
    2 sequential sub-tasks: {
        create IAM role for serviceaccount "kube-system/aws-load-balancer-controller",
        create serviceaccount "kube-system/aws-load-balancer-controller",
    } }2023-07-25 19:59:31 [ℹ]  building iamserviceaccount stack "eksctl-eks-lab-cluster-addon-iamserviceaccount-kube-system-aws-load-balancer-controller"
2023-07-25 19:59:31 [ℹ]  deploying stack "eksctl-eks-lab-cluster-addon-iamserviceaccount-kube-system-aws-load-balancer-controller"
2023-07-25 19:59:31 [ℹ]  waiting for CloudFormation stack "eksctl-eks-lab-cluster-addon-iamserviceaccount-kube-system-aws-load-balancer-controller"
2023-07-25 20:00:02 [ℹ]  waiting for CloudFormation stack "eksctl-eks-lab-cluster-addon-iamserviceaccount-kube-system-aws-load-balancer-controller"
2023-07-25 20:00:02 [ℹ]  created serviceaccount "kube-system/aws-load-balancer-controller"
Running: helm repo add eks https://aws.github.io/eks-charts
"eks" has been added to your repositories
Running: helm repo update
Hang tight while we grab the latest from your chart repositories...
...Successfully got an update from the "eks" chart repository
Update Complete. ⎈Happy Helming!⎈
Running: helm install aws-load-balancer-controller eks/aws-load-balancer-controller -n kube-system --set clusterName=eks-lab-cluster --set serviceAccount.create=false --set serviceAccount.name=aws-load-balancer-controller
NAME: aws-load-balancer-controller
LAST DEPLOYED: Tue Jul 25 20:00:12 2023
NAMESPACE: kube-system
STATUS: deployed
REVISION: 1
TEST SUITE: None
NOTES:
AWS Load Balancer controller installed!- Command: To confirm that the AWS Load Balancer Controller pods are in a Running state, run the following command:
kubectl get pods \
 -n kube-system \
 --selector=app.kubernetes.io/name=aws-load-balancer-controller
Expected output:
******************************
**** This is OUTPUT ONLY. ****
******************************

NAME                                           READY   STATUS    RESTARTS   AGE
aws-load-balancer-controller-f8c97b585-7hhbm   1/1     Running   0          38s
aws-load-balancer-controller-f8c97b585-bxvn8   1/1     Running   0          37s
If the pods are not in a Running state, wait a few minutes before proceeding with the next task. Pods might be in a Pending state because the Amazon EKS nodes are still deploying (not in a Ready state).
- Command: To confirm the state of the working nodes, run the kubectl get nodescommand.
Expected output:
******************************
**** This is OUTPUT ONLY. ****
******************************

NAME                                          STATUS   ROLES    AGE   VERSION
ip-192-168-15-26.us-west-2.compute.internal   Ready    <none>   22m   v1.25.11-eks-a5565ad
ip-192-168-82-0.us-west-2.compute.internal    Ready    <none>   22m   v1.25.11-eks-a5565ad
If you see a Resources not found message, the working nodes are still deploying. It might take a few more minutes to complete.
For more information about the controller, see Installing the AWS Load Balancer Controller add-on.
Task 7: Deploying the lab application
In this task, you deploy the application to a cluster. A Kubernetes namespace provides the scope for pods, services, and deployments in the cluster.
- Command: To create a Kubernetes namespace for the application, run the following command:
kubectl create namespace containers-labExpected output:
******************************
**** This is OUTPUT ONLY. ****
******************************

namespace/containers-lab created
In the next steps, you deploy the sample application from the container images previously built and pushed to the Amazon ECR repositories. To correctly create the Kubernetes objects, you must pass some variables to the configuration file by using the envsubst command to replace file placeholders inside the configuration file.
For reference, the following YAML file contains Kubernetes manifests for a Deployment, a Service, and an Ingress object. You can find the file in your AWS Cloud9 environment, saved as
apiVersion: apps/v1
kind: Deployment
metadata:
  namespace: containers-lab
  name: eks-lab-deploy
  labels:
    app: eks-app
spec:
  replicas: 3
  selector:
    matchLabels:
      app: lab-app
  template:
    metadata:
      labels:
        app: lab-app
    spec:
      containers:
      - name: website
        image: $ECR_REPO_URI_WEBSITE:latest ## <-- Placeholder replaced with environment variable
        ports:
        - containerPort: 80
        volumeMounts:
        - mountPath: /var/metadata
          name: metadata-vol
      - name: sidecar
        image: $ECR_REPO_URI_SIDECAR:latest ## <-- Placeholder replaced with environment variable
        volumeMounts:
        - mountPath: /var/metadata
          name: metadata-vol
      volumes:
      - name: metadata-vol
        emptyDir: {}
---
apiVersion: v1
kind: Service
metadata:
  name: lab-service
  namespace: containers-lab
spec:
  ports:
    - port: 80
      targetPort: 80
      protocol: TCP
  type: NodePort
  selector:
    app: lab-app
---
apiVersion: networking.k8s.io/v1
kind: Ingress
metadata:
  namespace: containers-lab
  name: lab-ingress
  annotations:
    alb.ingress.kubernetes.io/scheme: internet-facing
    alb.ingress.kubernetes.io/target-type: ip
    kubernetes.io/ingress.class: alb
spec:
  rules:
    - http:
        paths:
        - path: /
          pathType: Prefix
          backend:
            service:
              name: lab-service
              port:
number: 80- Command: To substitute the variables in the YAML file and create the Kubernetes objects in the containers-lab namespace, run the following command:
cd ~/environment/eksLabRepo/eks-lab-app
envsubst < k8s-all.yaml | kubectl apply -f -
Expected output:
******************************
**** This is OUTPUT ONLY. ****
******************************

deployment.apps/eks-lab-deploy created
service/lab-service created
ingress.networking.k8s.io/lab-ingress created- Command: To confirm that the objects are being created, run the following command.
kubectl get all -n containers-labExpected output:
******************************
**** This is OUTPUT ONLY. ****
******************************

NAME                                  READY   STATUS    RESTARTS   AGE
pod/eks-lab-deploy-6d44b8bf5d-26bjt   2/2     Running   0          22s
pod/eks-lab-deploy-6d44b8bf5d-9vlc5   2/2     Running   0          22s
pod/eks-lab-deploy-6d44b8bf5d-mr468   2/2     Running   0          22s

NAME                  TYPE       CLUSTER-IP       EXTERNAL-IP   PORT(S)        AGE
service/lab-service   NodePort   10.100.246.106   <none>        80:30752/TCP   22s

NAME                             READY   UP-TO-DATE   AVAILABLE   AGE
deployment.apps/eks-lab-deploy   3/3     3            3           22s

NAME                                        DESIRED   CURRENT   READY   AGE
replicaset.apps/eks-lab-deploy-6d44b8bf5d   3         3         3       22s
As part of the application deployment, an ingress object is also created. The ingress object creates an ALB to direct traffic to the Kubernetes pods. The application could take a few minutes to deploy.
- Command: To confirm the pod IDs in the deployment, run the following command:
kubectl get pods -n containers-labExpected output:
******************************
**** This is OUTPUT ONLY. ****
******************************

NAME                              READY   STATUS    RESTARTS   AGE
eks-lab-deploy-6d44b8bf5d-26bjt   2/2     Running   0          70s
eks-lab-deploy-6d44b8bf5d-9vlc5   2/2     Running   0          70s
eks-lab-deploy-6d44b8bf5d-mr468 2/2 Running 0 70s- Command: To show the ingress object’s information, run the following command:
kubectl get ingress -n containers-labExpected output:
******************************
**** This is OUTPUT ONLY. ****
******************************

NAME          CLASS    HOSTS   ADDRESS                                                                  PORTS   AGE
lab-ingress <none> * k8s-containe-labingre-3207ffb4ea-513194013.us-west-2.elb.amazonaws.com 80 102s- Copy the DNS name of the ALB from the ADDRESS column, paste the address into a web browser, and observe the results.
Caution: It may take 2-3 minutes before the ingress enters an active state and its DNS records propagate. If the application doesn’t open in your browser, wait a few minutes and then try again. 
The website includes the Kubernetes Pod ID. When you refresh the web page, you might see how the ALB directs traffic to different pods in the Kubernetes deployment.
Notice the fields with no data, for example:
- AWS Account
- EKS Cluster Name
- Kubernetes version
- Cluster creation time
- Worker nodes instance type
By default, when Amazon EKS clusters have EC2 instances worker nodes, the pods have limited permissions to call the AWS API. They inherit the worker nodes’ EC2 instance profiles. The instance profiles have attached the following AWS managed policies:
- AmazonEKSWorkerNodePolicy
- AmazonEC2ContainerRegistryReadOnly
- AmazonSSMManagedInstanceCore
- AmazonEKS_CNI_Policy
In this case, the deployed application calls the API to retrieve data but does not have the required permissions. A best practice is to provide the required permissions to applications that run on a Kubernetes pod by using the IAM roles for service accounts feature. The IAM roles for service accounts feature provides the following benefits:
- Least privilege: By using the IAM roles for service accounts feature, you avoid having to provide extended permissions to the nodes’ IAM roles for pods on that node to call AWS APIs. You can scope IAM permissions to a service account, and only pods that use that service account have access to those permissions. This feature also means that you won’t need third-party solutions such as kiam or kube2iam.
- Credential isolation: A container can retrieve credentials only for the IAM role that is associated with the service account to which it belongs. A container never has access to credentials that are intended for another container that belongs to another pod.
- Auditability: Access and event logging is available through AWS CloudTrail to help ensure retrospective auditing.
Task 8: Configuring IAM roles for Amazon EKS pods
In this task, you turn on the IAM roles for service accounts feature.
In the previous task, the API calls that the pods perform are not permitted. Specifically, the pods request functions of the AWS Security Token Service (AWS STS) and the Amazon EKS APIs.
You can use the eksctl command to create a Kubernetes service account and an IAM role, and attach a preprepared IAM policy named eks-lab-read-policy to that role, to use the IAM roles for service accounts feature.
- Command: To create a service account and attach policies to the role, run the following command:
eksctl create iamserviceaccount \
    --name iampolicy-sa \
    --namespace containers-lab \
    --cluster eks-lab-cluster \
    --role-name "eksRole4serviceaccount" \
    --attach-policy-arn arn:aws:iam::$ACCOUNT_NUMBER:policy/eks-lab-read-policy \
    --approve \
    --override-existing-serviceaccounts
The command might take a minute to complete.
Expected output:
******************************
**** This is OUTPUT ONLY. ****
******************************

2023-07-25 20:05:20 [ℹ]  1 existing iamserviceaccount(s) (kube-system/aws-load-balancer-controller) will be excluded
2023-07-25 20:05:20 [ℹ]  1 iamserviceaccount (containers-lab/iampolicy-sa) was included (based on the include/exclude rules)
2023-07-25 20:05:20 [!]  metadata of serviceaccounts that exist in Kubernetes will be updated, as --override-existing-serviceaccounts was set
2023-07-25 20:05:20 [ℹ]  1 task: {
    2 sequential sub-tasks: {
        create IAM role for serviceaccount "containers-lab/iampolicy-sa",
        create serviceaccount "containers-lab/iampolicy-sa",
    } }2023-07-25 20:05:20 [ℹ]  building iamserviceaccount stack "eksctl-eks-lab-cluster-addon-iamserviceaccount-containers-lab-iampolicy-sa"
2023-07-25 20:05:20 [ℹ]  deploying stack "eksctl-eks-lab-cluster-addon-iamserviceaccount-containers-lab-iampolicy-sa"
2023-07-25 20:05:20 [ℹ]  waiting for CloudFormation stack "eksctl-eks-lab-cluster-addon-iamserviceaccount-containers-lab-iampolicy-sa"
2023-07-25 20:05:50 [ℹ]  waiting for CloudFormation stack "eksctl-eks-lab-cluster-addon-iamserviceaccount-containers-lab-iampolicy-sa"
2023-07-25 20:06:26 [ℹ]  waiting for CloudFormation stack "eksctl-eks-lab-cluster-addon-iamserviceaccount-containers-lab-iampolicy-sa"
2023-07-25 20:06:26 [ℹ] created serviceaccount "containers-lab/iampolicy-sa"- Command: To review annotations for the previously created Kubernetes service account iampolicy-sa, run the following command:
kubectl get sa iampolicy-sa -n containers-lab -o yamlExpected output:
******************************
**** This is OUTPUT ONLY. ****
******************************

apiVersion: v1
kind: ServiceAccount
metadata:
  annotations:
    eks.amazonaws.com/role-arn: arn:aws:iam::638489295426:role/eksRole4serviceaccount
  creationTimestamp: "2023-07-25T20:06:26Z"
  labels:
    app.kubernetes.io/managed-by: eksctl
  name: iampolicy-sa
  namespace: containers-lab
  resourceVersion: "5755"
  uid: bbacb8b9-a65d-4fab-b52e-c834b655662d
Note: In the command output, notice the IAM role ARN in the annotations section. The output shows that the Kubernetes service account now has associated an IAM role.
- Command: To bind the Kubernetes service account to the application pods and update the running deployment, run the following command:
kubectl set serviceaccount \
 deployment eks-lab-deploy \
 iampolicy-sa -n containers-lab
Expected output:
******************************
**** This is OUTPUT ONLY. ****
******************************

deployment.apps/eks-lab-deploy serviceaccount updated- Command: To confirm that the previous kubectl command added the service account to the Kubernetes deployment, run the following command.
kubectl describe deployment.apps/eks-lab-deploy \
 -n containers-lab | grep 'Service Account'
Expected output:
******************************
**** This is OUTPUT ONLY. ****
******************************

Service Account: iampolicy-sa- Refresh the browser window that shows the container application. Notice that the data fields are complete. This means that the application running on the pods can successfully get a response from the API calls.
It might take up to a minute for the application to update the web console.
Note: As a reminder, you can run the following command to get the ALB DNS name:
kubectl get ingress -n containers-lab- Command: Notice that the Cluster creation time information is in UNIX epoch time. You can run the following command, replacing CLUSTER_CREATION_TIME with the value shown on the website to display a common date format. You can choose your local time zone, for example, TZ=America/Chicagoto display local time.
TZ=UTC date -d @CLUSTER_CREATION_TIMEFor further information, see IAM roles for service accounts.
Task 9: Deploying Amazon CloudWatch Container Insights
Amazon CloudWatch Container Insights collect, aggregate, and summarize metrics and logs from your containerized applications and microservices. CloudWatch Container Insights is available for Amazon Elastic Container Service (Amazon ECS), Amazon Elastic Kubernetes Service (Amazon EKS), and Kubernetes platforms on Amazon EC2.
In this task, you add CloudWatch Container Insights to the lab application and review the results. The first step is to add a required IAM policy, CloudWatchAgentServerPolicy to your Amazon EKS compute nodes attached role policy.
- Command: To add the IAM policy to the Amazon EKS instance role, run the following commands:
export instanceId=$(aws ec2 describe-instances \
 --filters Name=instance-type,Values=t3.medium \
 --query "Reservations[0].Instances[*].InstanceId" \
 --output text)
export instanceProfileArn=$(aws ec2 describe-instances \
 --instance-ids $instanceId \
 --query 'Reservations[*].Instances[*].IamInstanceProfile.Arn' \
 --output text)
export instanceProfileName=$(echo $instanceProfileArn | \
 awk -F/ '{print $NF}')
export roleName=$(aws iam get-instance-profile \
 --instance-profile-name $instanceProfileName \
 --query "InstanceProfile.Roles[*].RoleName" \
 --output text)
To learn more about the prerequisites, see Container Insights - Verify prerequisites.
- Command: To deploy CloudWatch Container Insights to the Amazon EKS cluster, run the following commands:
export CLUSTER_NAME=$(aws eks describe-cluster \
 --name eks-lab-cluster \
 --query 'cluster.name' \
 --output text)
curl https://raw.githubusercontent.com/aws-samples/amazon-cloudwatch-container-insights/latest/k8s-deployment-manifest-templates/deployment-mode/daemonset/container-insights-monitoring/quickstart/cwagent-fluentd-quickstart.yaml | \
 sed "s/{{cluster_name}}/$CLUSTER_NAME/;s/{{region_name}}/$AWS_DEFAULT_REGION/" | \
 kubectl apply -f -
Expected output:
******************************
**** This is OUTPUT ONLY. ****
******************************

  % Total    % Received % Xferd  Average Speed   Time    Time     Time  Current
                                 Dload  Upload   Total   Spent    Left  Speed
100 16515  100 16515    0     0  86834      0 --:--:-- --:--:-- --:--:-- 86921
namespace/amazon-cloudwatch created
serviceaccount/cloudwatch-agent created
clusterrole.rbac.authorization.k8s.io/cloudwatch-agent-role created
clusterrolebinding.rbac.authorization.k8s.io/cloudwatch-agent-role-binding created
configmap/cwagentconfig created
daemonset.apps/cloudwatch-agent created
configmap/cluster-info created
serviceaccount/fluentd created
clusterrole.rbac.authorization.k8s.io/fluentd-role created
clusterrolebinding.rbac.authorization.k8s.io/fluentd-role-binding created
configmap/fluentd-config created
daemonset.apps/fluentd-cloudwatch created
CloudWatch Container Insights might take 8–10 minutes to fully deploy and show the cluster data. Wait for the deployment to complete before proceeding to the following steps.
To access the CloudWatch service, in the AWS Management Console, on the Services menu, choose Management & Governance, and then choose CloudWatch.
In the navigation pane, choose Insights, and then choose Container Insights.
If you notice an IAM permission error, you can safely ignore the warning and continue with the next step.
To view a map of the Kubernetes environment, in the upper-right area, choose Map view.
On the Kubernetes environment map, choose lab-service.

Notice the metrics page, which shows CPU, memory, and network utilization.
- To view the pod performance dashboard and container performance information, on the right side of the page, choose View dashboard. From there, you can explore the different CloudWatch Container Insights options.
For this lab, you can safely ignore the IAM Permission Error that you see when you view the dashboard.
To learn more about CloudWatch Container Insights on Amazon EKS, see Quick Start setup for Container Insights on Amazon EKS and Kubernetes.
Conclusion
Congratulations! You should now be able to do the following tasks:
- Prepare an AWS Cloud9 workspace.
- Create an Amazon EKS cluster.
- Prepare a Docker application and push it to an Amazon ECR repository.
- Deploy an AWS Load Balancer Controller.
- Deploy an application into an Amazon EKS cluster.
- Configure and view CloudWatch Container Insights on a Kubernetes cluster.
End lab
Follow these steps to close the console and end your lab.
Return to the AWS Management Console.
At the upper-right corner of the page, choose AWSLabsUser, and then choose Sign out.
Choose End lab and then confirm that you want to end your lab.
Additional resources
- AWS Workshop - Introduction to Kubernetes
- Creating an Amazon EKS cluster
- Create a kubeconfig for Amazon EKS
- Kubernetes kubectl Cheat Sheet
For more information about AWS Training and Certification, see https://aws.amazon.com/training/.
Your feedback is welcome and appreciated.
If you would like to share any feedback, suggestions, or corrections, please provide the details in our AWS Training and Certification Contact Form.
posted by Kaavannan K @ October 09, 2022
0 comments
![]()


0 Comments:
Post a Comment
Note: only a member of this blog may post a comment.
<< Home